Cooking Q&A Webinar 9/4/2020

On Thursday 9th April 2020 we hosted our very first cooking Q&A webinar, where our Community Chef Iain McLellan answered questions put to him by some keen home cooks. You can watch the webinar in full below.
|
info@greenerkirkcaldy.org.uk 8 East Fergus Place, Kirkcaldy, KY1 1XT 01592 858 458
Going Greener Together
By Steven

On Thursday 9th April 2020 we hosted our very first cooking Q&A webinar, where our Community Chef Iain McLellan answered questions put to him by some keen home cooks. You can watch the webinar in full below.
< 6 Ways To Save Energy While Working From Home | Free Bike Borrowing for NHS Workers >
By Craig Leitch

We are reopening our free bike borrowing scheme to make bikes available for NHS key workers! Electric, folding and push bikes are available.
Cycling is perfect for social distancing and carries less contamination risk than using public transport. We have a limited number of folding and electric bikes available on a first come first serve basis. We’ll drop the bike off to your home whilst following social distancing guidelines. You will be required to show NHS identification.
Find out more by emailing: craig@greenerkirkcaldy.org.uk.
< Cooking Q&A Webinar 9/4/2020 | Making The Most Of Your Chicken: Video Tutorial >By Steven

Welcome to the first in our new series of cooking video tutorials where our Community Chef, Iain takes you through some recipes for what you might have in your cupboards or fridges.
First up, Iain goes through the process of making the most out of a whole chicken. Some people might have gotten their hands on a whole chicken rather than the different cuts, so the video below is a very useful watch if you want to find out how to prepare the bird for cooking.
Hope you find the tutorial very useful! Let us know on our social media platforms what stuff you have in your cupboards and fridges that Iain could give you ideas on and keep an eye out for more tutorials on our website.
< Free Bike Borrowing for NHS Workers | Beginners Guide: Growing Veg From Seed >
By Steven

April is the busiest month for vegetable gardeners as there are so many seeds that we can now sow. However, growing plants from seed can feel daunting. Seed packets have lots of information on the back of them which can be overwhelming.
I take a note of a few key things so that I can track the progress of my plants and start planning where to put them. I jot down:
Lots of seeds can be germinated outdoors this month. Follow the instructions on the packet and plant seeds straight out into a prepared bed or container. Water them regularly and don’t allow the bed/container to dry out now. Check on them often and protect from pests if you are concerned.
Some seeds will still only germinate indoors though and if you choose to grow these plants you will need to give them a little bit more care and attention. Keep in mind that you are trying to mimic nature to get these seeds to germinate. They will need heat, light and water. To get off to the best start, wash all your pots, use fresh seeds and open a new bag of seed compost.
What you will need:
Select a Pot

Sow a Seed

Water

Aftercare

Look out on our website and social media for more gardening guides soon!
< Making The Most Of Your Chicken: Video Tutorial | Simple Guide To No Dig Gardening >By Steven

If you are fortunate enough to have a garden, you may be considering growing your own fruit and veg. By taking a “no-dig” approach you could be set up and ready to plant out in just a few hours.
You will need a few things to get started:

Step 1: Pick a Space
The ideal site will get lots of sun during the day, be well sheltered and not too close to big shrubs or trees. It really doesn’t matter if the existing ground is grassy, weedy or it’s already bare soil. However, if it’s grassy and very overgrown, then you might want to give the area a strim before continuing.

Step 2: Pick a Size
Decide on the size and shape of your bed and mark it out with some edging or twine. In the future, you will need to be able to access your plants as they grow. If you are making a large scale bed then consider creating pathways through it. Hammer in your edging. I used some wooden edging but, you could use pallet wood, stones, bricks or anything really. Be as creative as you want!

Step 3: Cut Cardboard to Size
Now you have to line the area with cardboard. It’s best to use card which isn’t laminated and has no ink on it – if possible. Use a sharp knife to cut your pieces to size and overlap all the edges. Once you have covered every part, you should give the cardboard a good soak with water.

Step 4: Lay out Compost
Next, cover the cardboard with a layer of compost which is at least 10cm thick. I used 4 x 50 litre bags of general purpose peat-free compost from my local garden centre. However, there are a wide variety of composts online and in supermarkets. There are also soil calculators available online to help you work out how much compost you need. I gave my bed another soaking and now its time for me to plant out my veggies!

Look out for more handy growing guides and tips going forward.
Further Reading
This simple guide is intended for a novice gardener. However, I can recommend the following website for more in-depth reading:
By Steven

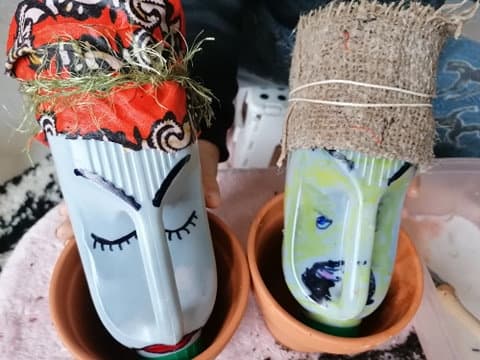
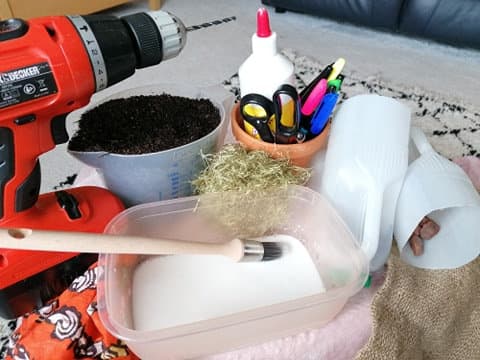
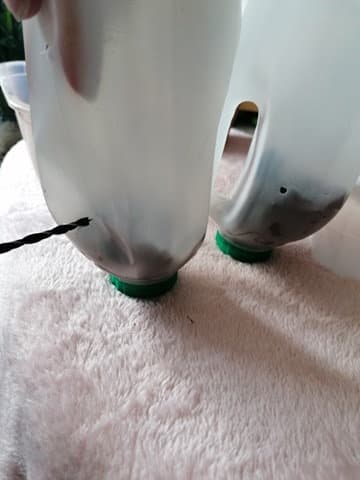
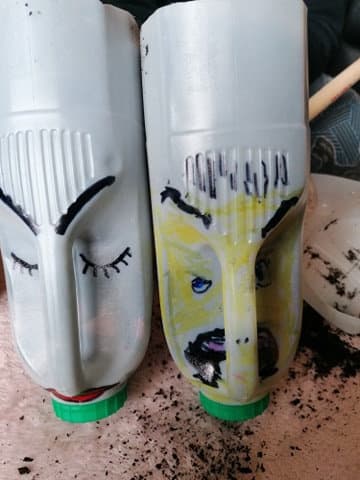
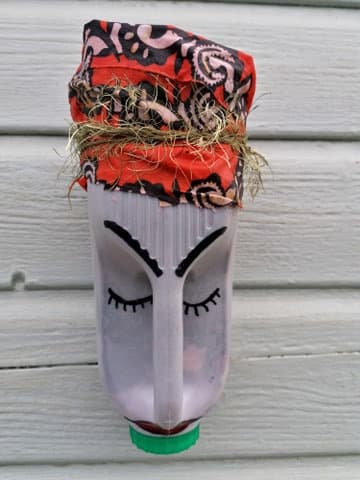
Looking to do something a little different in the garden this year and not spend a lot of money doing it? Below we will explain how to upcycle a milk carton in order to use it as a planter. Hope you enjoy.
Inspired by: Gardening on a Budget
What you will need

Make

Decorate

Grow

Tag us in your creations!
< Simple Guide To No Dig Gardening | Bike Maintenance Webinar – 21/4/20 >In the last year we have supported over 100 volunteers to gain skills, receive training, improve their employability and have fun.
Support us and help shape the work we do by becoming a member. Our members play a key role in setting our priorities, through consultations or by joining our committee.
Get updates on our news and events straight to your inbox. View our privacy notice
"*" indicates required fields