Blog:
Food & GrowingArchives
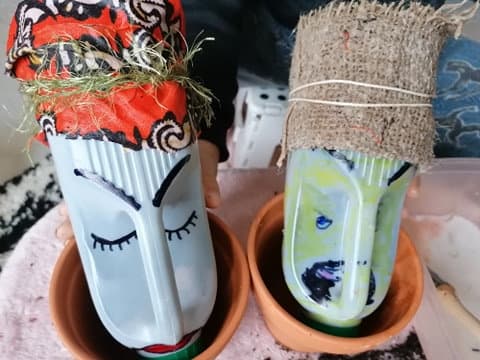
Upcycled Milk Carton Planter
Looking to do something a little different in the garden this year and not spend a lot of money doing it? Below we will explain how to upcycle a milk carton in order to use it as a planter. Hope you enjoy.
Inspired by: Gardening on a Budget
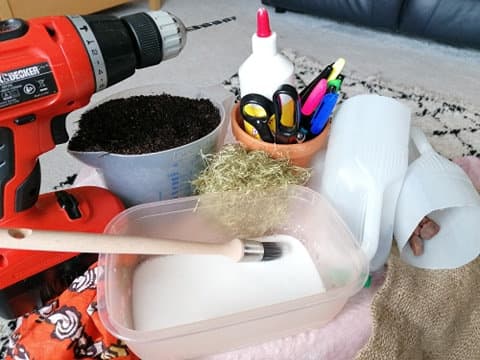
What you will need
- Clean Milk Cartons
- Permanent Markers
- Fabric
- PVA Glue
- Twine
- Compost
- Seeds
- Drill (Optional)
- Little Stones or Gravel
Make
- Cut a piece of fabric 10cmx35cm and sit in a bowl of PVA glue mixed with a little bit of water.
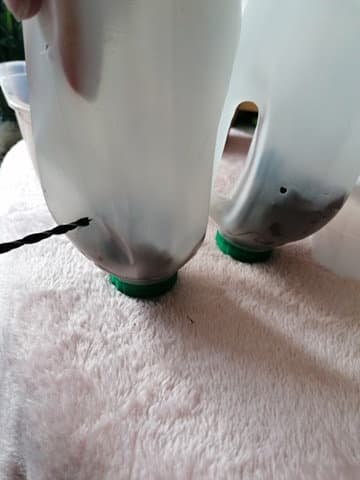
- Turn your milk carton upside down and cut the base off.
- Carefully drill a few drainage holes around the screw cap.
- Drill another hole on the back of the carton so that you can hang it up on a hook later.
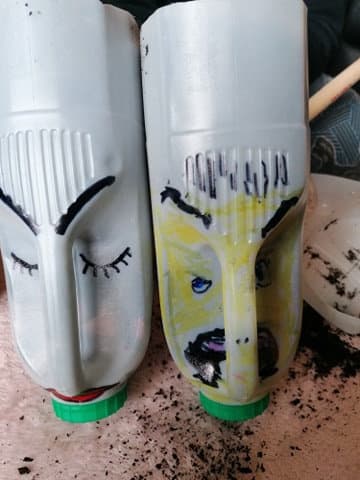
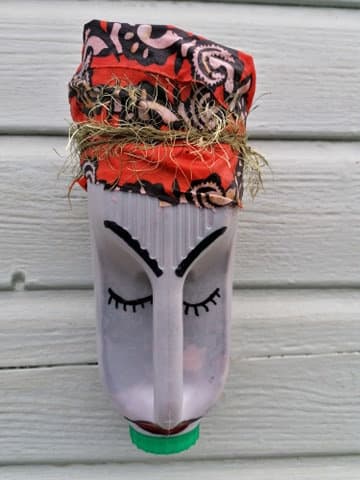
Decorate
- Use permanent markers to draw a face on your carton.
- Wring out your fabric and wrap around the carton – a bit like a headband.
- Secure fabric in place with a bit of twine.
- Put somewhere warm and allow to dry.
- Put a few wee stones inside your planter ready for the next stage.
Grow
- Fill up your new planter with some seed compost (right to the top) and gently firm down.
- Sprinkle some seeds on top, (we did chives) thyme, parsley or even nasturtiums could do well.
- Hang it outside, somewhere sunny and remember to water regularly!
- We’ll post a follow up picture in a few weeks to see how the hair is getting on.
Tag us in your creations!
|